Frequently asked questions
FAQ's
- iOS
- Android
- Windows UWP
- Cloud-Services
Standard license:
- 4 minutes templates incl. standard agenda items
- unlimited protocol sending
Premium subscription:
- More than 20 minutes including standard agenda items
- unlimited protocol sending
- Logo editable in header line
- Logo can be defined per project
- Support further development of the app
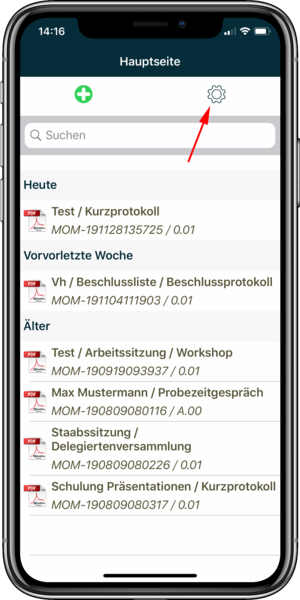
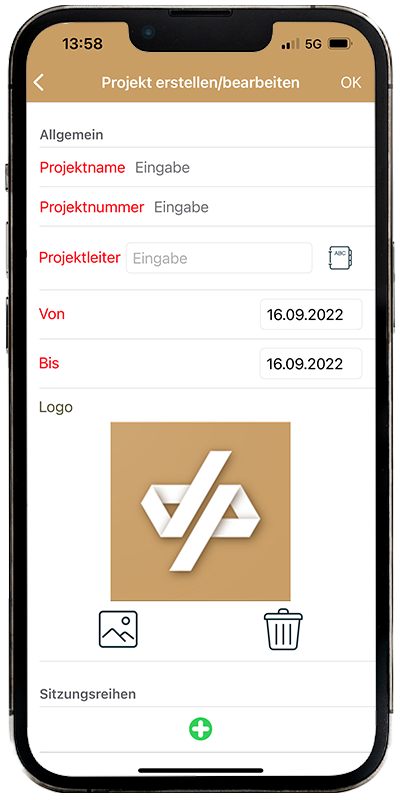
Under the settings you will find the item Project Basic Data. With a "click" on the +, you can open a new project
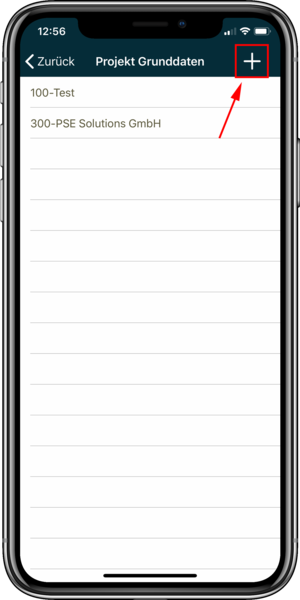
Note: If you are unable to open new projects, you can find information on this under "Cloud services".
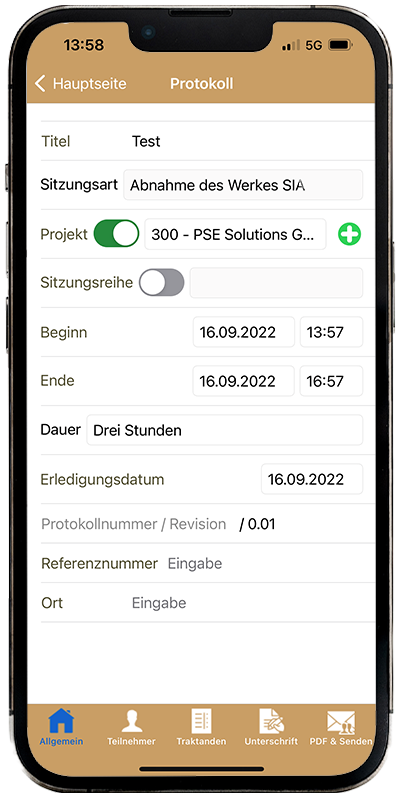
With a "click" on the green + you create a session row. Important: You can only create a series of sessions if a project has been entered.
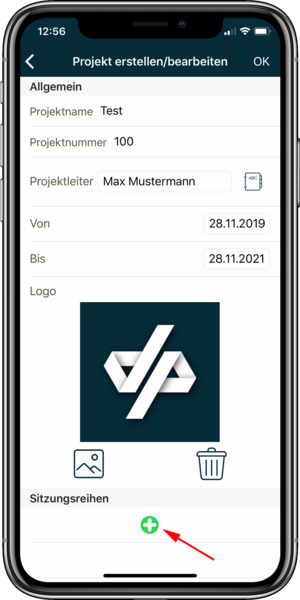
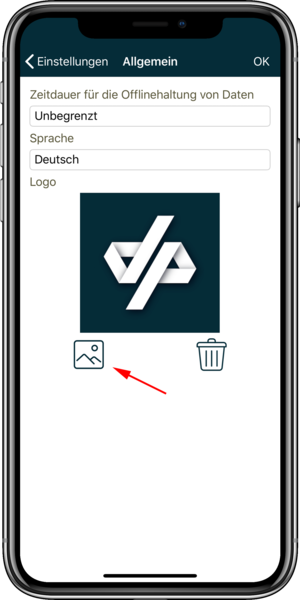
Under the settings you will find the item General, there you can now define the logo accordingly (Only included in the premium subscription).
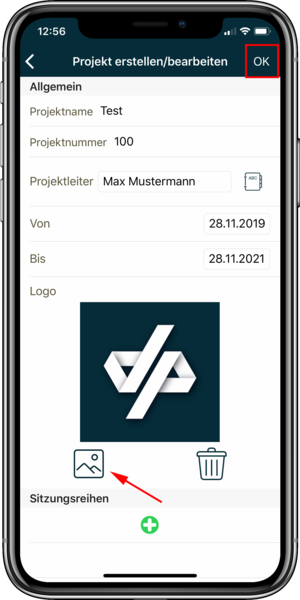
Under Settings / Project Basic Data / Project you can customize the logo per project as desired.
Important: Only included in the premium subscription.
Under the settings you will find the item General, where you can now select one of the five system languages (German, English, French, Italian, Spanish).

You can easily copy a log that you have created:
Android: Long press on the already created log, then select copy.
IOS: "swipe" to the left on the corresponding log with your finger, then select copy.
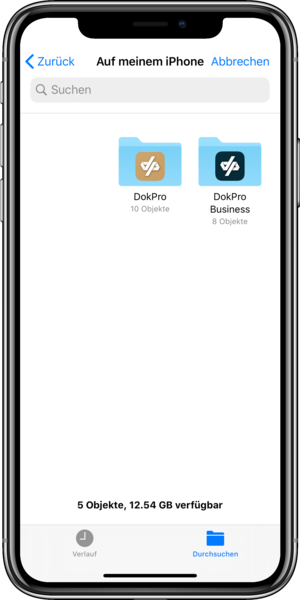
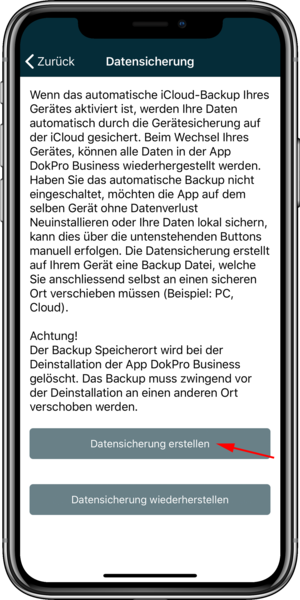
Under the item Settings you will find the category "Data Backup". With a "click" on the button you can save your data locally on the corresponding device. The data will be saved on your device under Files.

You can access your files by clicking the Restore Backup button. From there, you can select the file you want to restore.
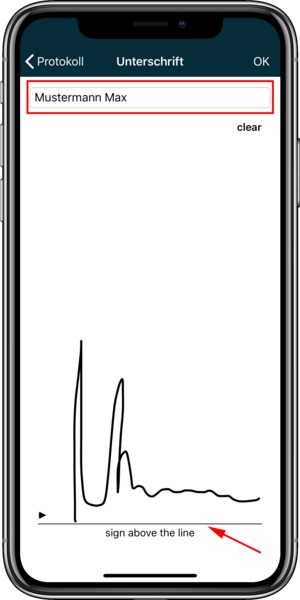
Minutes may be signed in writing to confirm their accuracy. The minutes that have been signed cannot be edited again.
If you want to move a log entry or even an entire topic, keep your finger on the entry you want to move for a longer period of time, after which you can reposition it as you wish.
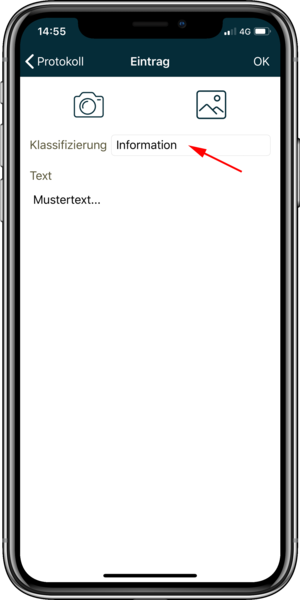
Each log entry can be classified as information, task or resolution.
Information: This serves simply as information.
Task: This is a task and can, for example, be assigned to an employee.
Resolution: A resolution shows what was decided at the meeting.
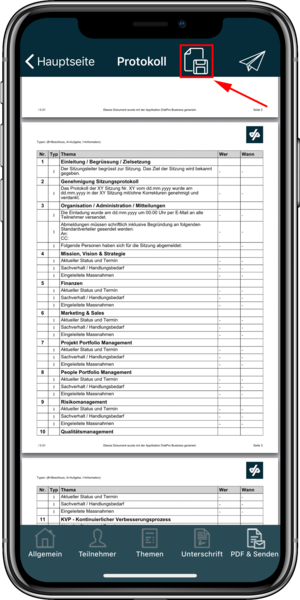
When you have created the protocol, you will find the Save button in the upper left corner under the item Send PDF &. You will then find the created protocol among the files on your device.
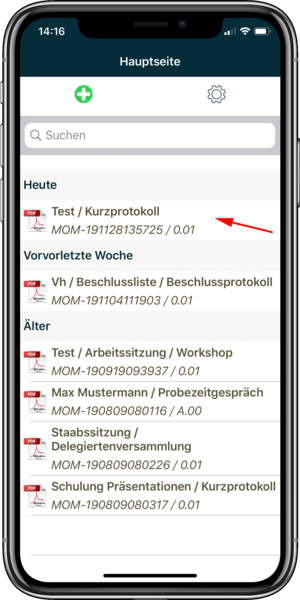
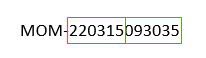
The log number is composed of the date and time.
Example: Date (red) & Time(green)
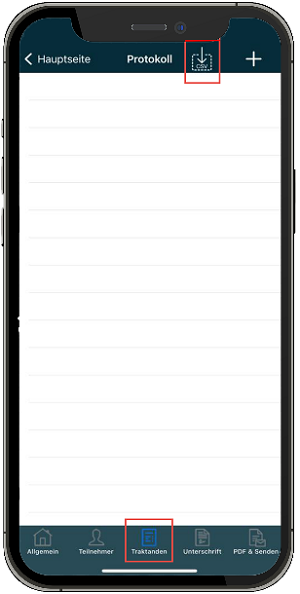
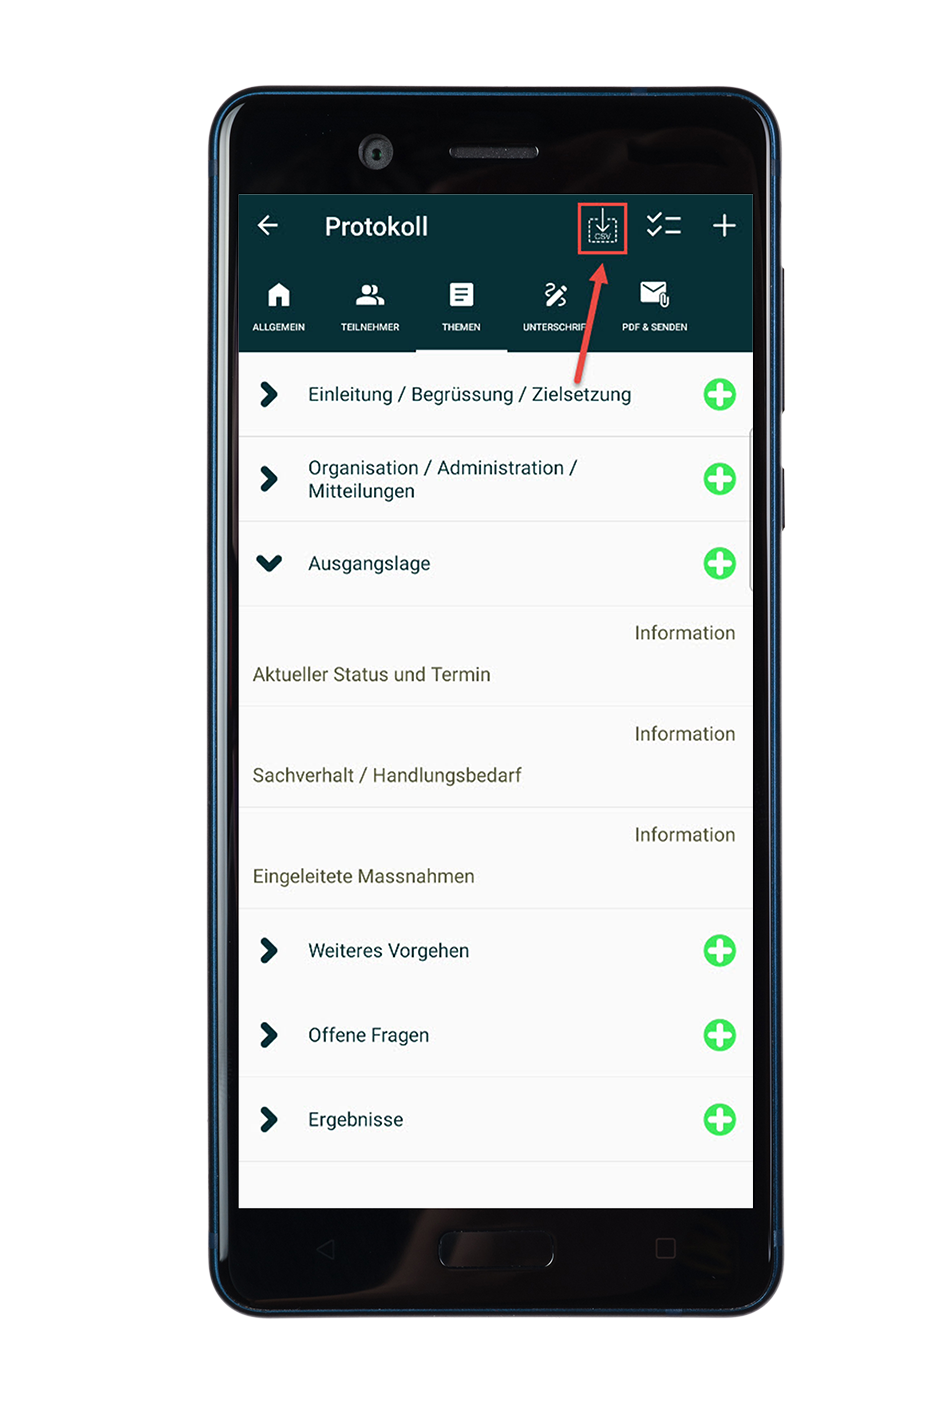
To create a CSV, press the "CSV" button under the "Agenda" section.
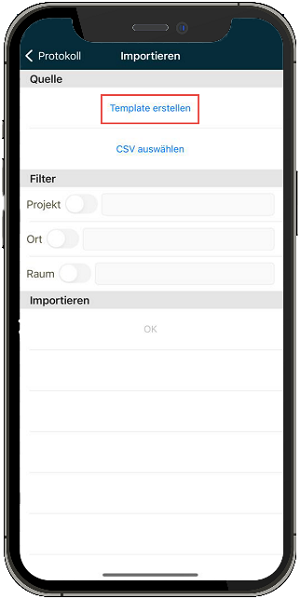
Select "Create Template" to generate a CSV template.
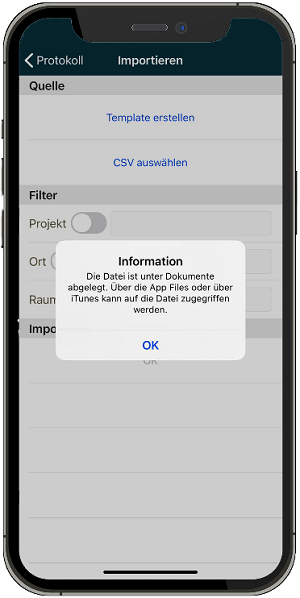
The template has now been filed under your documents.
The template must be filled in the following way:
Note: The data must be filled as specified, so that the CSV can be implemented error-free in the DokPro application.
(Click on image to view full size)

Now press "Select CSV" and import your CSV into the application. When you have finished this step, the following message will appear.
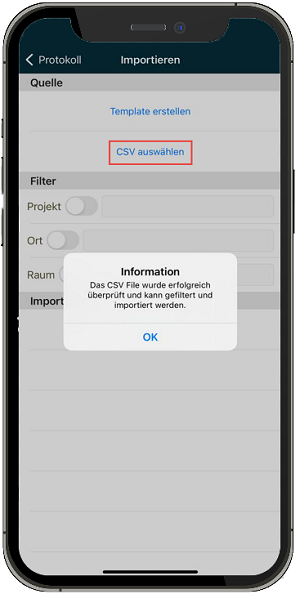
Now you can insert the project, location and room. After that press "OK".

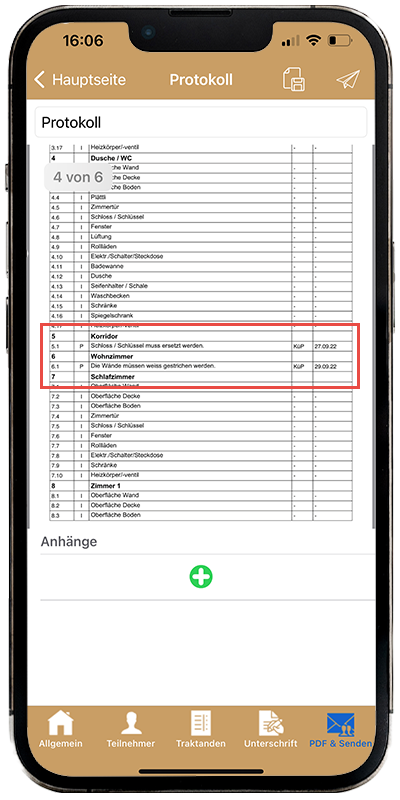
The pending items listed in the CSV have been imported successfully.

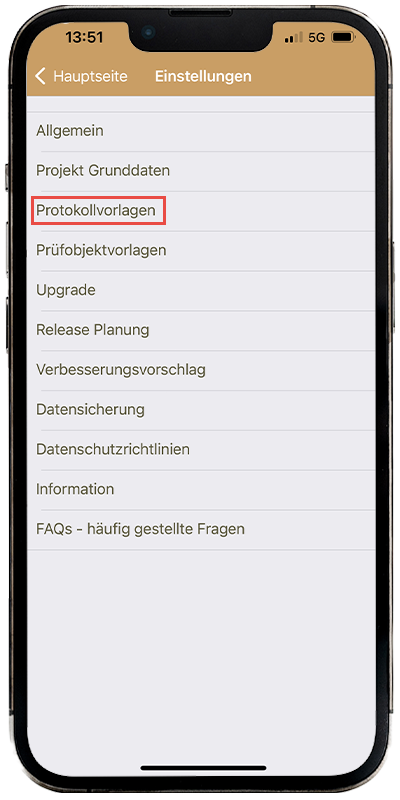
Select "Protocol templates" in the settings.
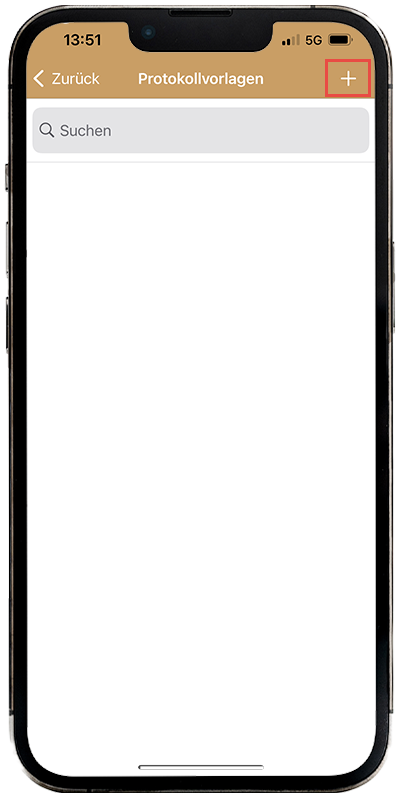
Then press the plus in the upper right corner.
First of all, in general, enter the desired name of the protocol and the type of session in the title.

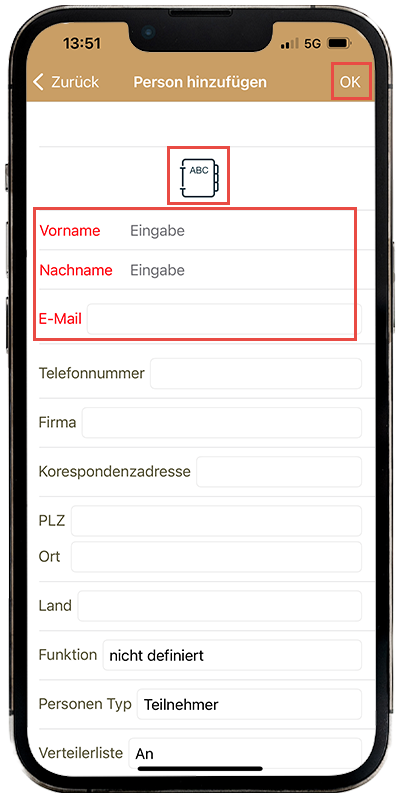
Continue by clicking on Participants. Then click on the plus in the upper right corner. Here you can either add an already saved participant in the address book or fill in the fields directly. Add the participant with "OK" in the upper right corner.
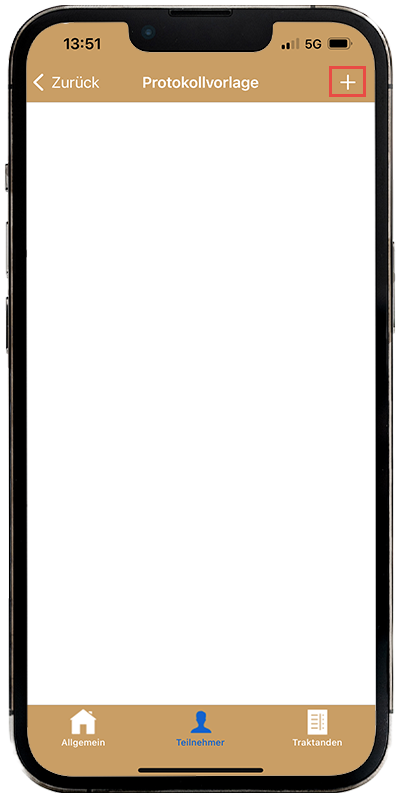
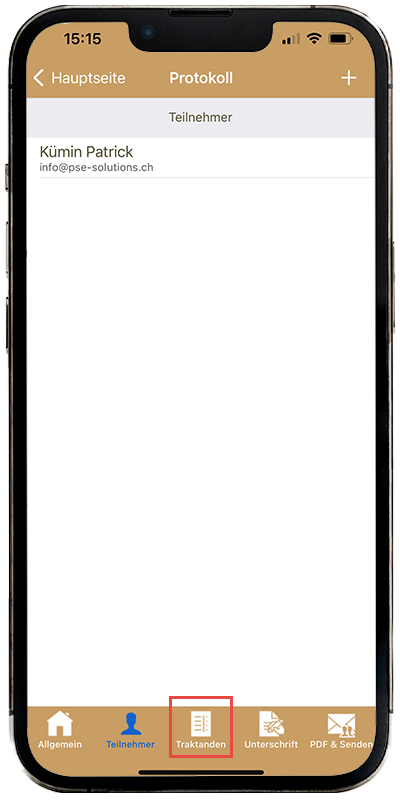
Continue by clicking on Agenda items. Then click on the plus at the top right. Enter the topic to be discussed here and close with "OK". Now there is a green plus next to the entry. Click on it and enter the desired information.

Note: If you are unable to create new protocol templates, you can find information on this under "Cloud services".
Select "Test object templates" in the settings.
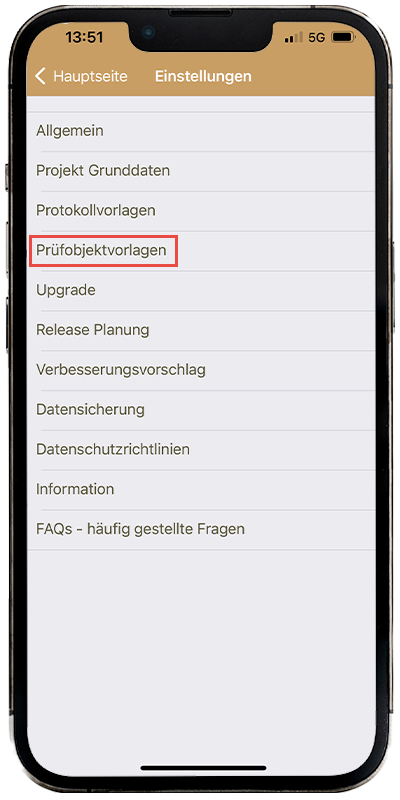
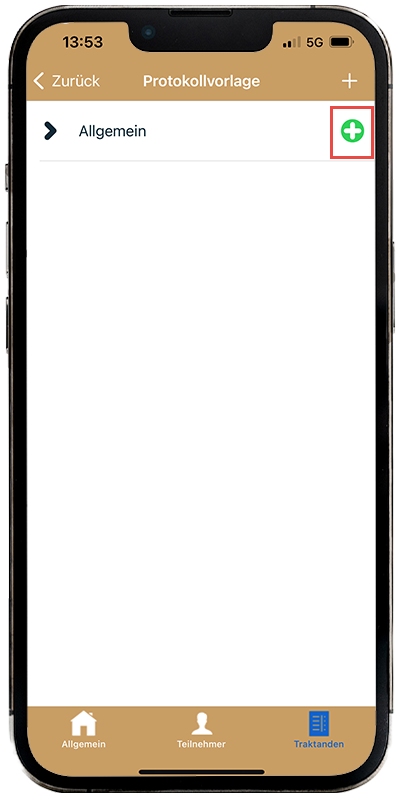
Then click on the plus in the upper right corner.
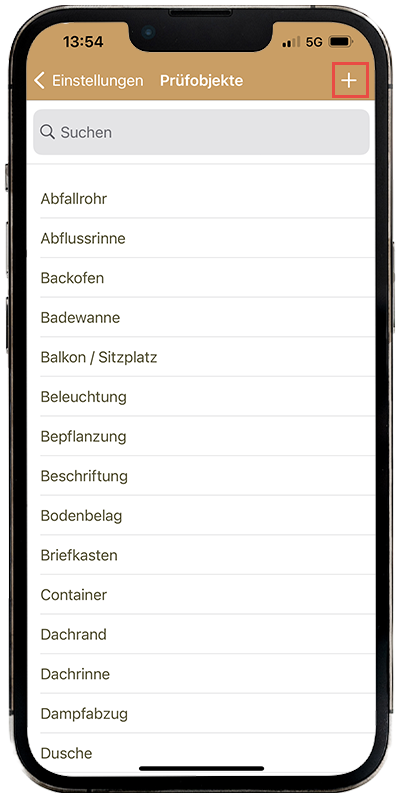
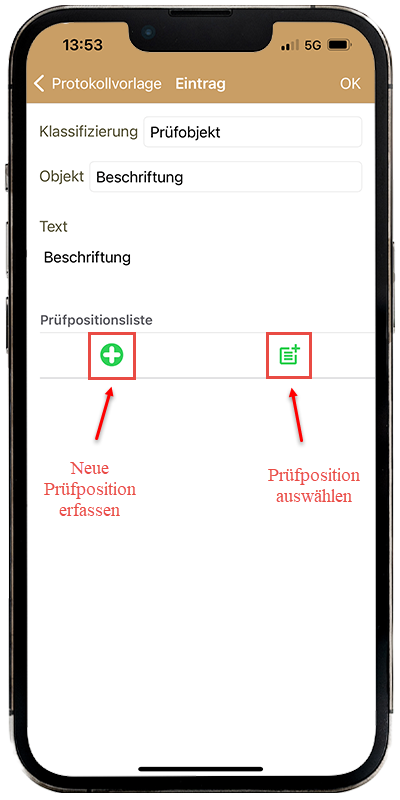
First enter the title of the test object. Then click on the green plus at the bottom.

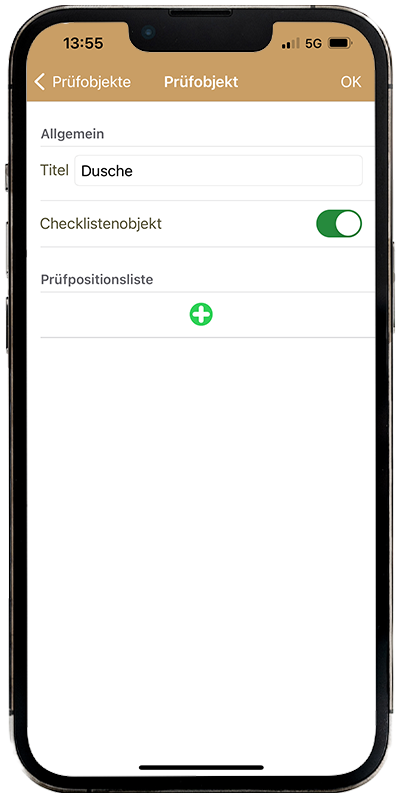
Enter the title you need, e.g. Screw. Then enter the desired text e.g. there is a screw missing in xy area. You can create as many test positions as needed and also add the desired designation.

Now click on "OK" in the upper right corner. Now the test object is created.


Note: If you are unable to create new test object templates, you can find information on this under "Cloud services".
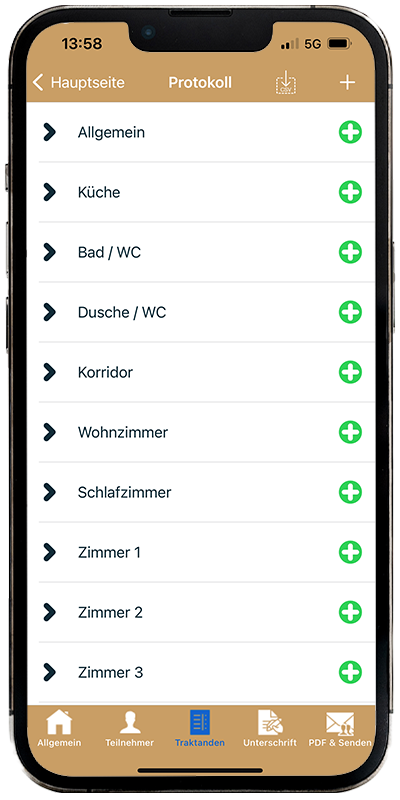
Click the green plus on the main page. Or reuse already created protocols.
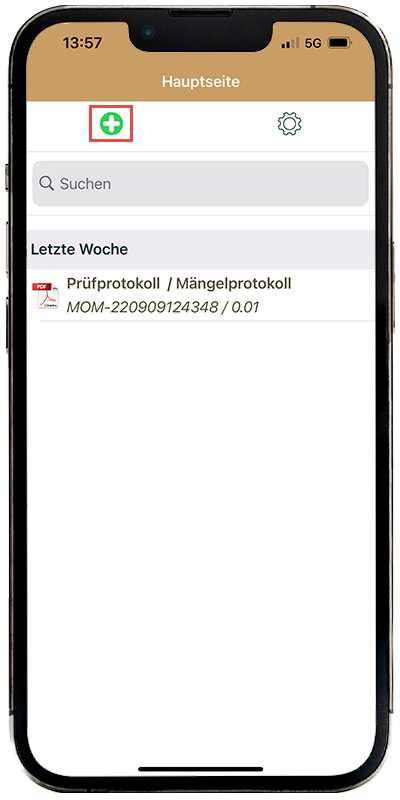
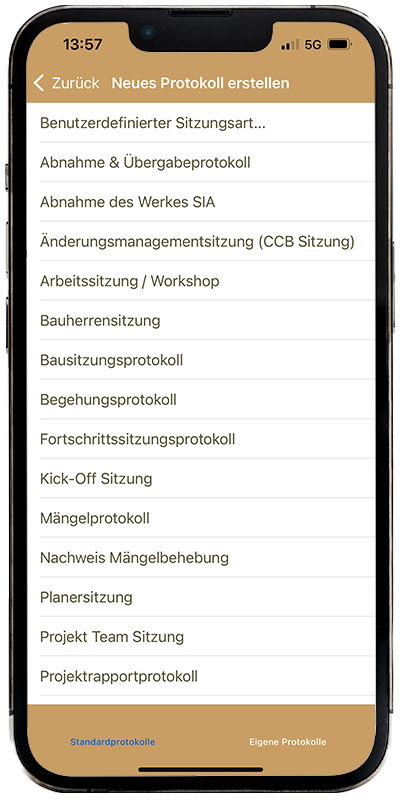
Either select a standard protocol or create a new one.
Select standard tracts if you need them. Then fill in the title and everything else.

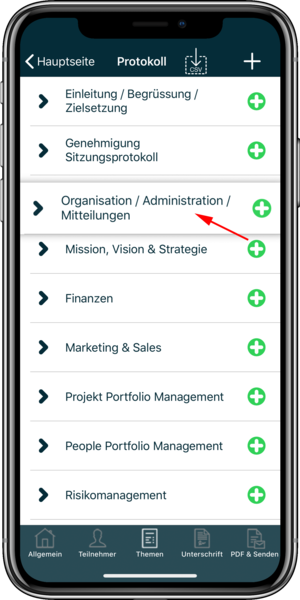
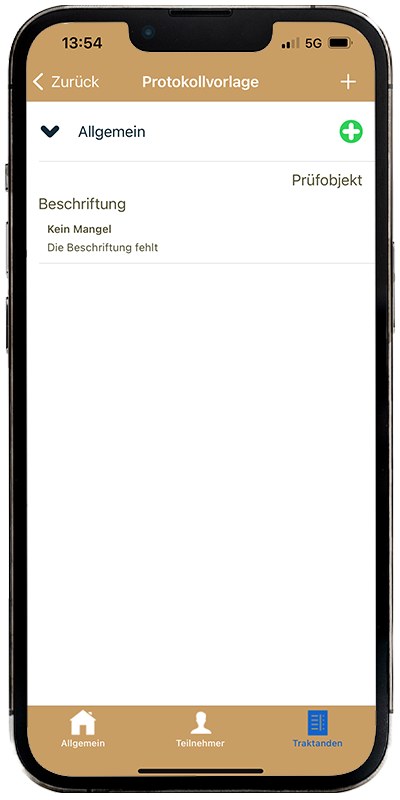
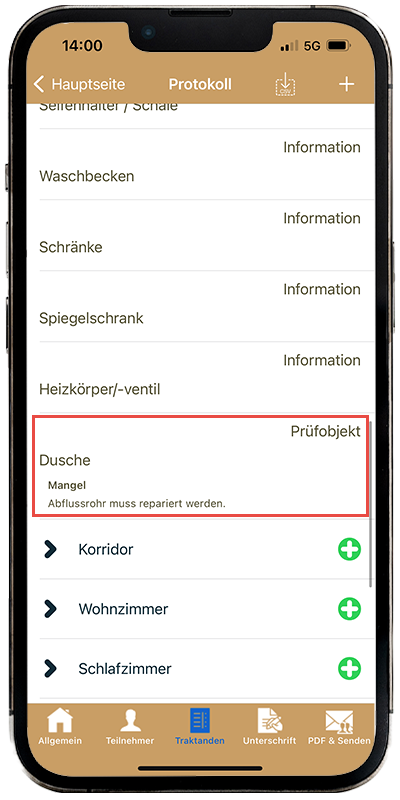
In the agenda, go to the corresponding topic and click on the green plus.

Click on "Test object" in the classification. Then click on "Object". Now all created test objects are displayed. Select the desired test object.
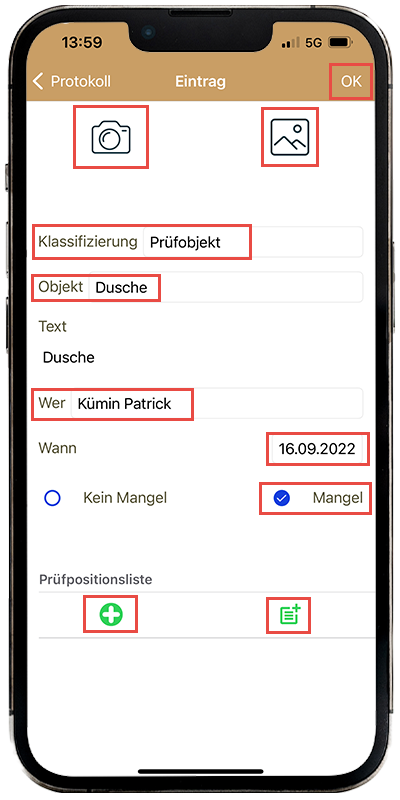
In the "Test position list" you can either create one yourself by clicking on the green plus. Or you can select the green sheet and choose the already created test positions.
With ,,OK'' the page is left and you return to the protocol.
Click the green plus on the main page. Or reuse already created protocols.
Either select a standard protocol or create a new one.
Select standard tracts if you need them. Then fill in the title and everything else.
In the agenda, go to the corresponding topic and click on the green plus.
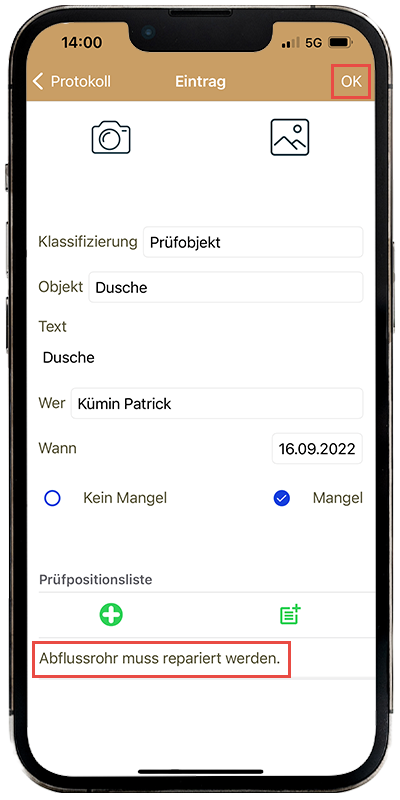
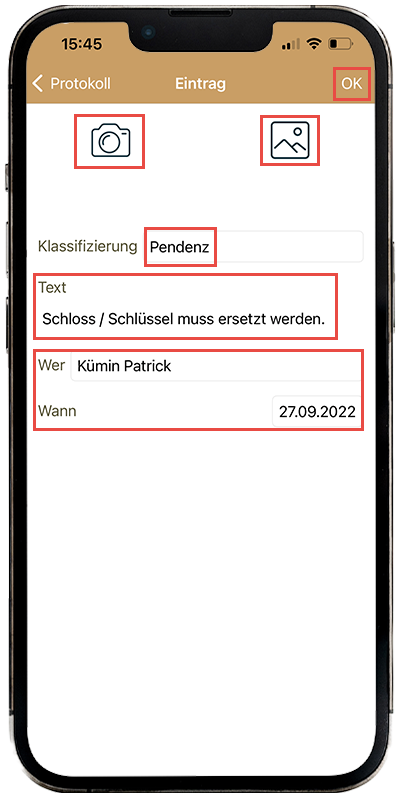
Click on "Pending" in the classification. Then enter the desired text plus who is responsible for it. At "when" you can select the date until when it has to be done.
With ,,OK'' the page is left and you return to the protocol.

Standard license:
- 4 minutes templates incl. standard agenda items
- unlimited protocol sending
Premium subscription:
- More than 20 minutes including standard agenda items
- unlimited protocol sending
- Logo editable in header line
- Logo can be defined per project
- Support further development of the app
Under the settings you will find the item Project Basic Data. With a "click" on the +, you can open a new project
Note: If you are unable to open new projects, you can find information on this under "Cloud services".
With a "click" on the green + you create a session row. Important: You can only create a series of sessions if a project has been entered.
Under the settings you will find the item General, there you can now define the logo accordingly (Only included in the premium subscription).
Under Settings / Project Basic Data / Project you can customize the logo per project as desired.
Important: Only included in the premium subscription.
Under the settings you will find the item General, where you can now select one of the five system languages (German, English, French, Italian, Spanish).
You can easily copy a log that you have created:
Android: Long press on the already created log, then select copy.
IOS: "swipe" to the left on the corresponding log with your finger, then select copy.
Under the item Settings you will find the category "Data Backup". With a "click" on the button you can save your data locally on the corresponding device. The data will be saved on your device under Files.
You can access your files by clicking the Restore Backup button. From there, you can select the file you want to restore.
Minutes may be signed in writing to confirm their accuracy. The minutes that have been signed cannot be edited again.
If you want to move a log entry or even an entire topic, keep your finger on the entry you want to move for a longer period of time, after which you can reposition it as you wish.
Each log entry can be classified as information, task or resolution.
Information: This serves simply as information.
Task: This is a task and can, for example, be assigned to an employee.
Resolution: A resolution shows what was decided at the meeting.
When you have created the protocol, you will find the Save button in the upper left corner under the item Send PDF &. You will then find the created protocol among the files on your device.
The log number is composed of the date and time.
Example: Date (red) & Time(green)
To create a CSV, press the "CSV" button under the "Agenda" section.
Select "Create Template" to generate a CSV template.

The template has now been filed under your documents.
The template must be filled in the following way:
Note: The data must be filled as specified, so that the CSV can be implemented error-free in the DokPro application.
(Click on image to view full size)
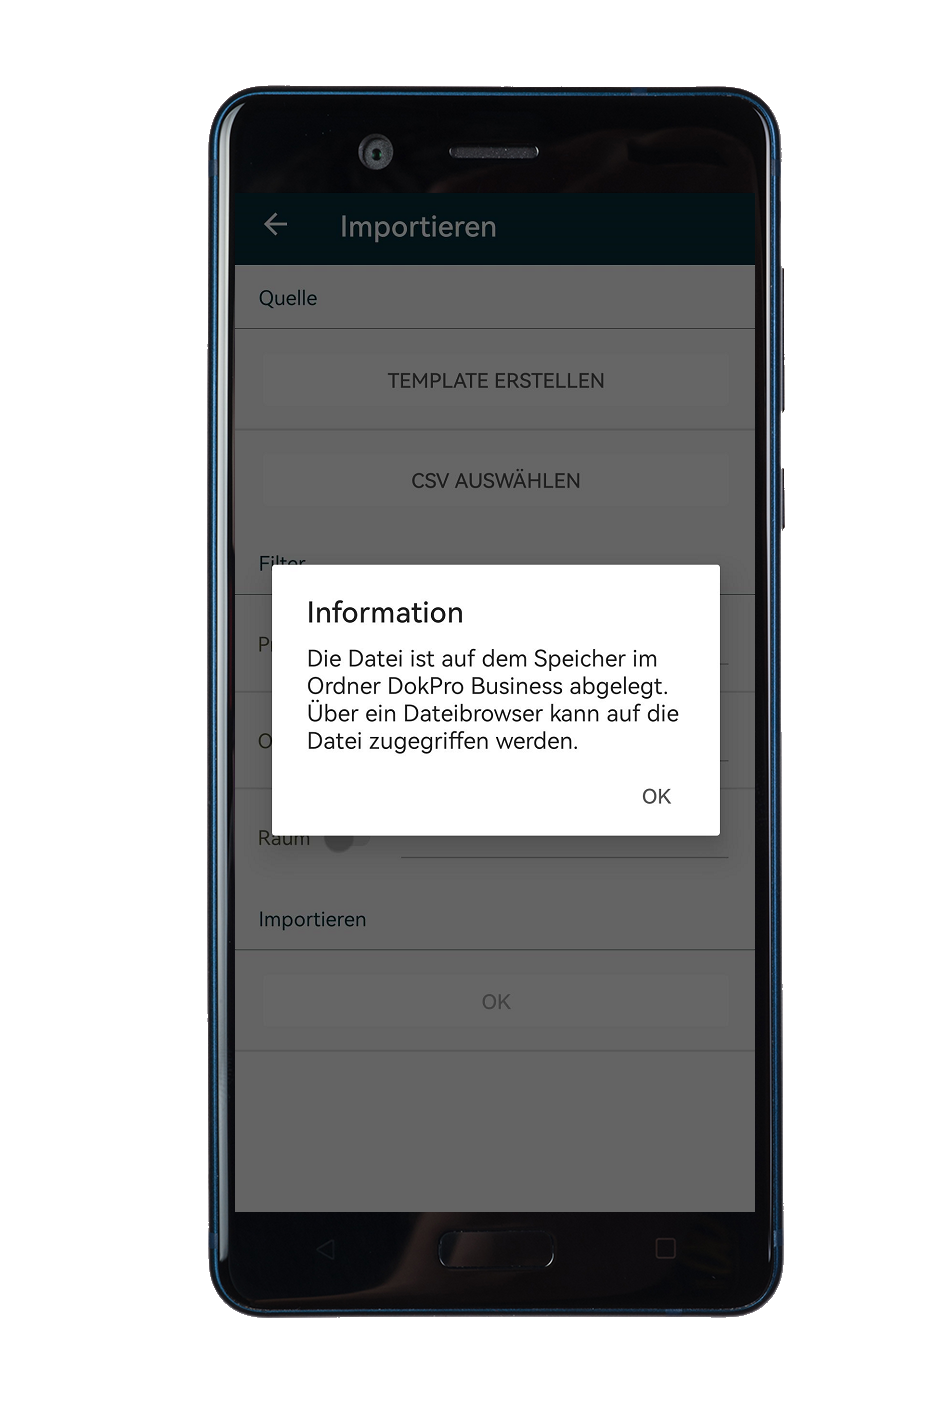
Now press "Select CSV" and import your CSV into the application. When you have finished this step, the following message will appear.

Now you can insert the project, location and room. After that press "OK".
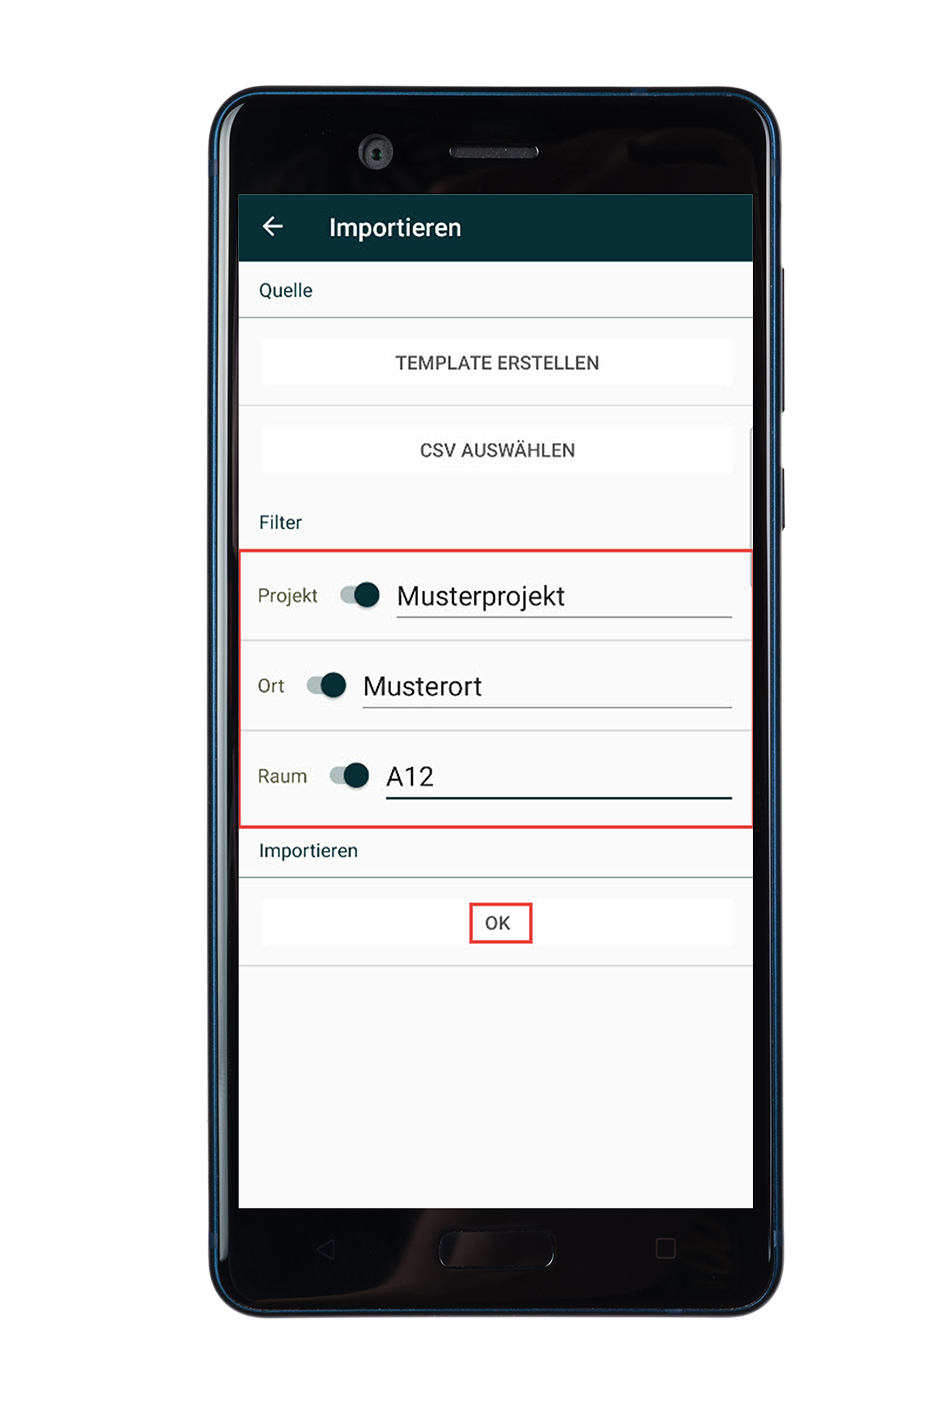
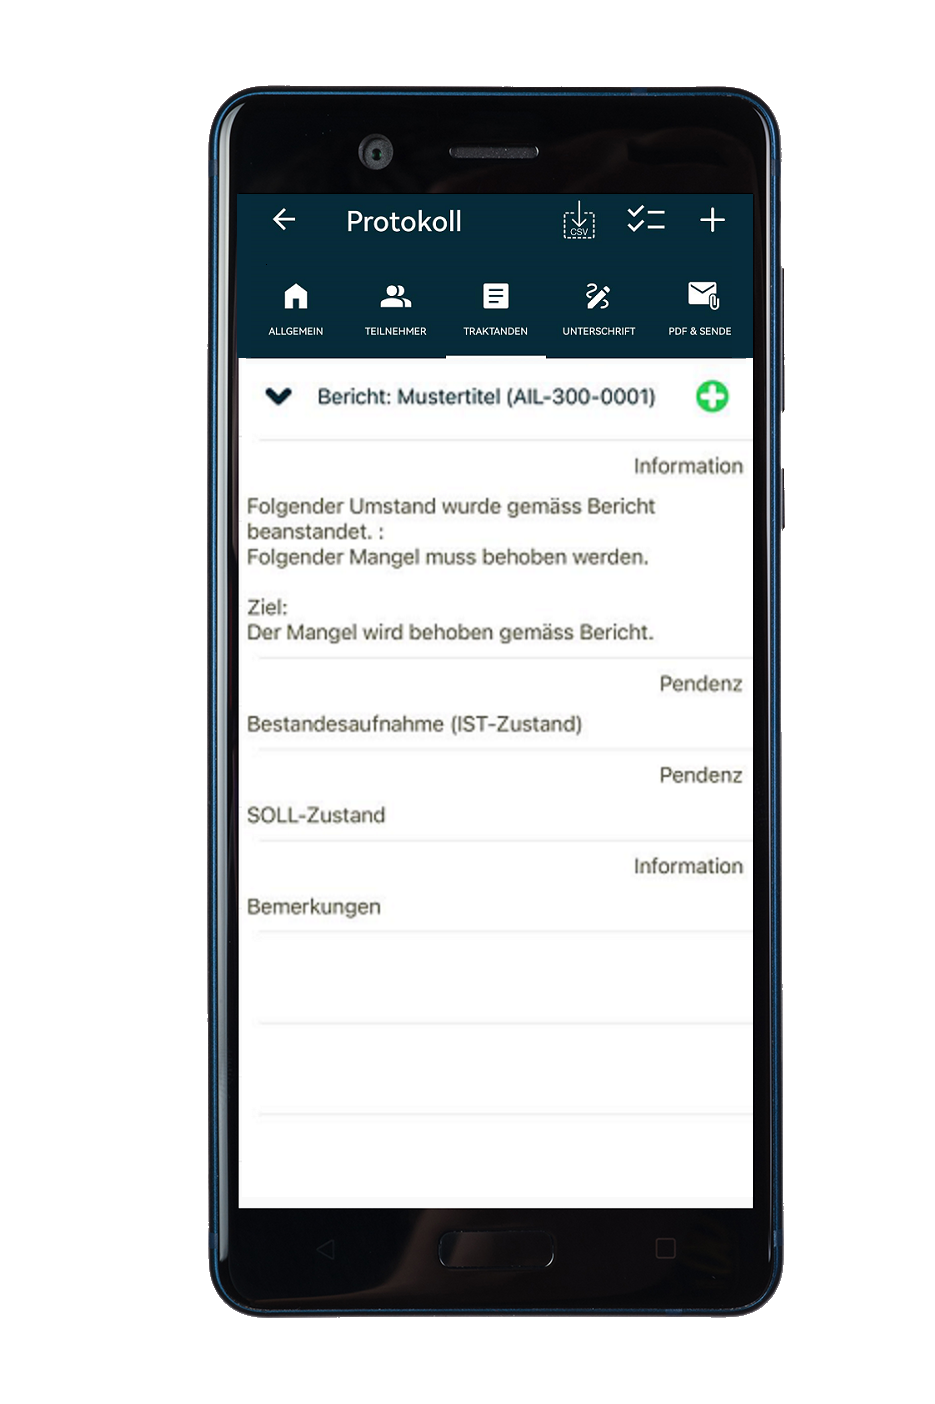
The pending items listed in the CSV have been imported successfully.
Select "Protocol templates" in the settings.
Then press the plus in the upper right corner.
First of all, in general, enter the desired name of the protocol and the type of session in the title.
Continue by clicking on Participants. Then click on the plus in the upper right corner. Here you can either add an already saved participant in the address book or fill in the fields directly. Add the participant with "OK" in the upper right corner.
Continue by clicking on Agenda items. Then click on the plus at the top right. Enter the topic to be discussed here and close with "OK". Now there is a green plus next to the entry. Click on it and enter the desired information.
Note: If you are unable to create new protocol templates, you can find information on this under "Cloud services".
Select "Test object templates" in the settings.
Then click on the plus in the upper right corner.
First enter the title of the test object. Then click on the green plus at the bottom.
Enter the title you need, e.g. Screw. Then enter the desired text e.g. there is a screw missing in xy area. You can create as many test positions as needed and also add the desired designation.
Now click on "OK" in the upper right corner. Now the test object is created.
Note: If you are unable to create new test object templates, you can find information on this under "Cloud services".
Click the green plus on the main page. Or reuse already created protocols.
Either select a standard protocol or create a new one.
Select standard tracts if you need them. Then fill in the title and everything else.
In the agenda, go to the corresponding topic and click on the green plus.
Click on "Test object" in the classification. Then click on "Object". Now all created test objects are displayed. Select the desired test object.
In the "Test position list" you can either create one yourself by clicking on the green plus. Or you can select the green sheet and choose the already created test positions.
With ,,OK'' the page is left and you return to the protocol.
Click the green plus on the main page. Or reuse already created protocols.
Either select a standard protocol or create a new one.
Select standard tracts if you need them. Then fill in the title and everything else.
In the agenda, go to the corresponding topic and click on the green plus.
Click on "Pending" in the classification. Then enter the desired text plus who is responsible for it. At "when" you can select the date until when it has to be done.
With ,,OK'' the page is left and you return to the protocol.
Connect Outlook to Windows
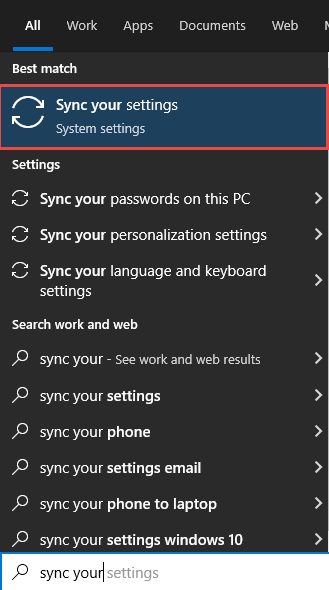
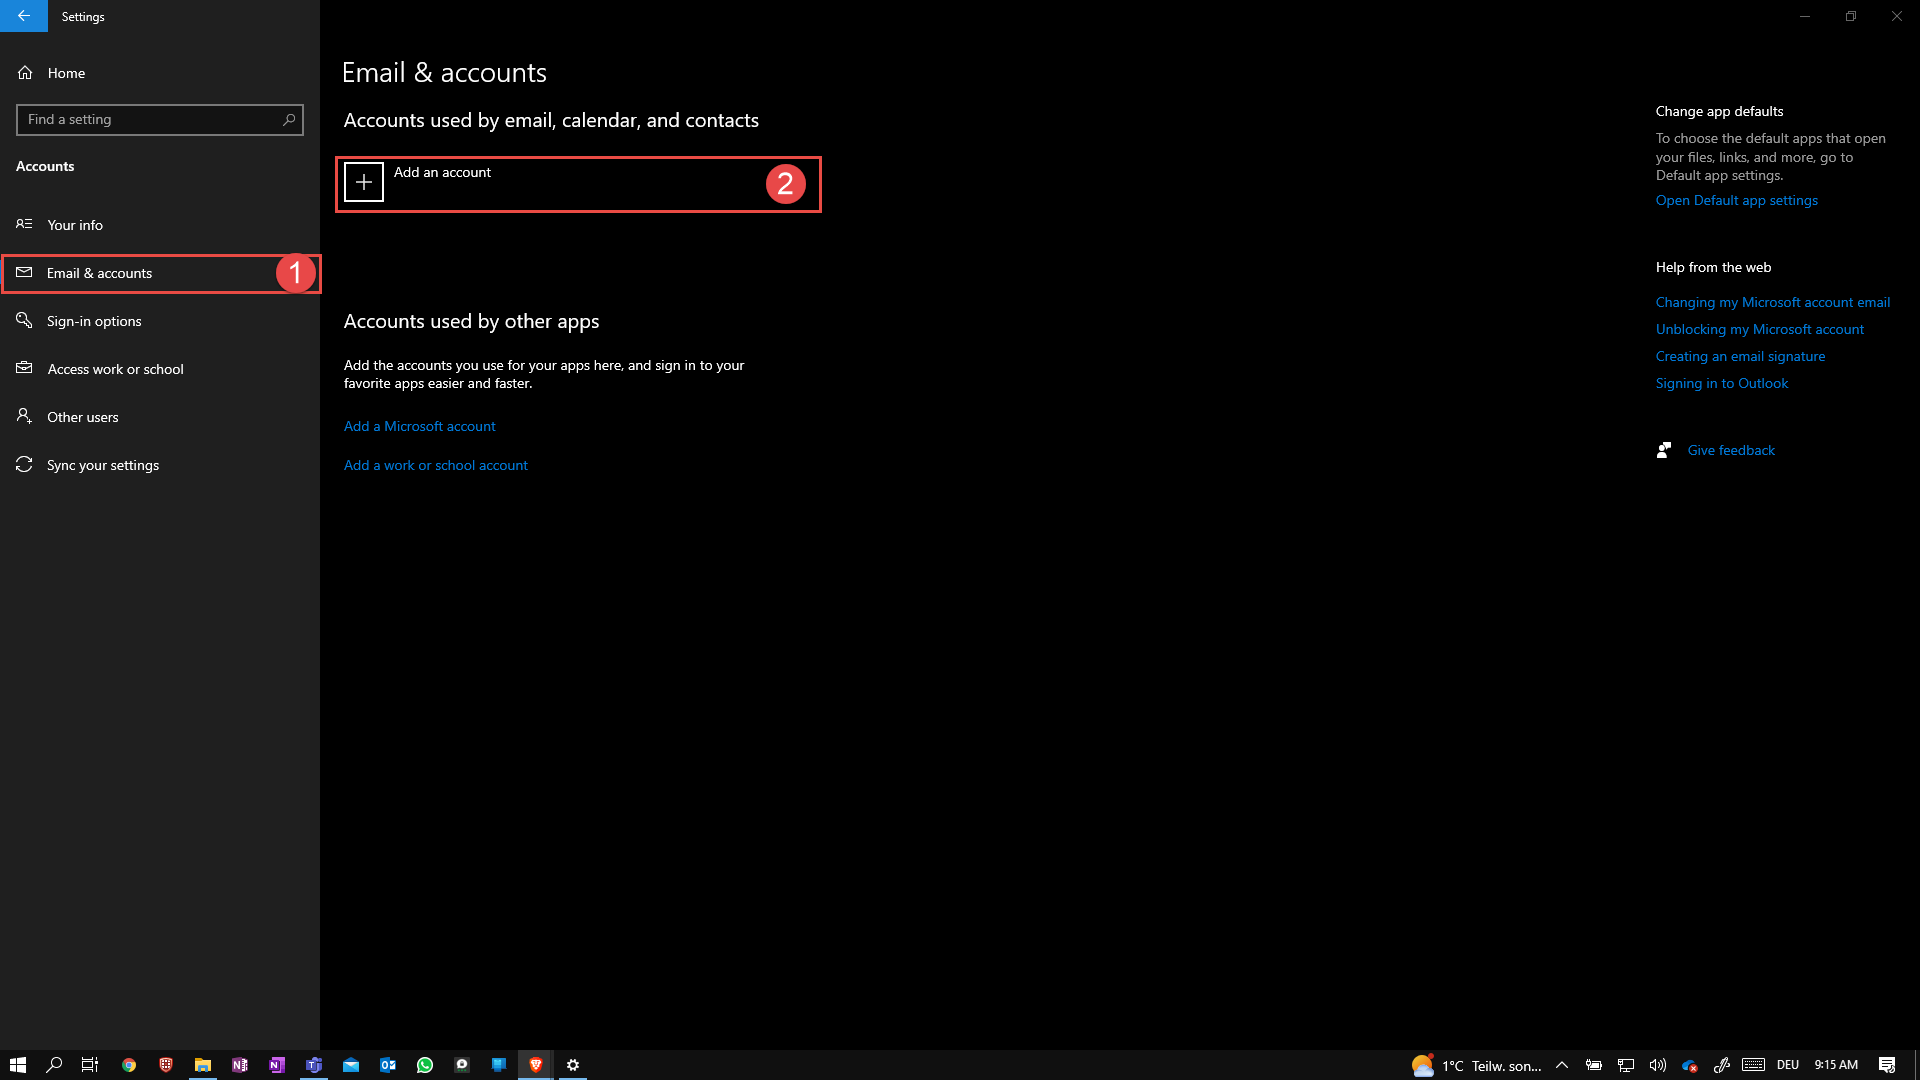
In the Windows search field, call up «Synchronization Settings».
In the menu items, "Email & Account" must be selected. After that, select the button "Add an account".
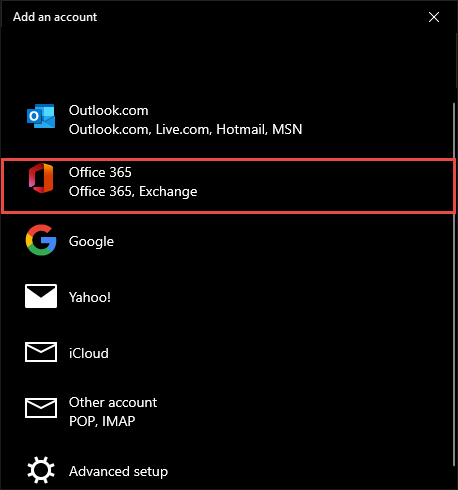
After that, the desired E-Mail connection must be selected. In our case, this is the Office 365 Exchange connection.
Please enter the desired E-Mail address, which should be connected. Confirm with the Button "Next"

After that you will need to enter your password from your Office 365 account.
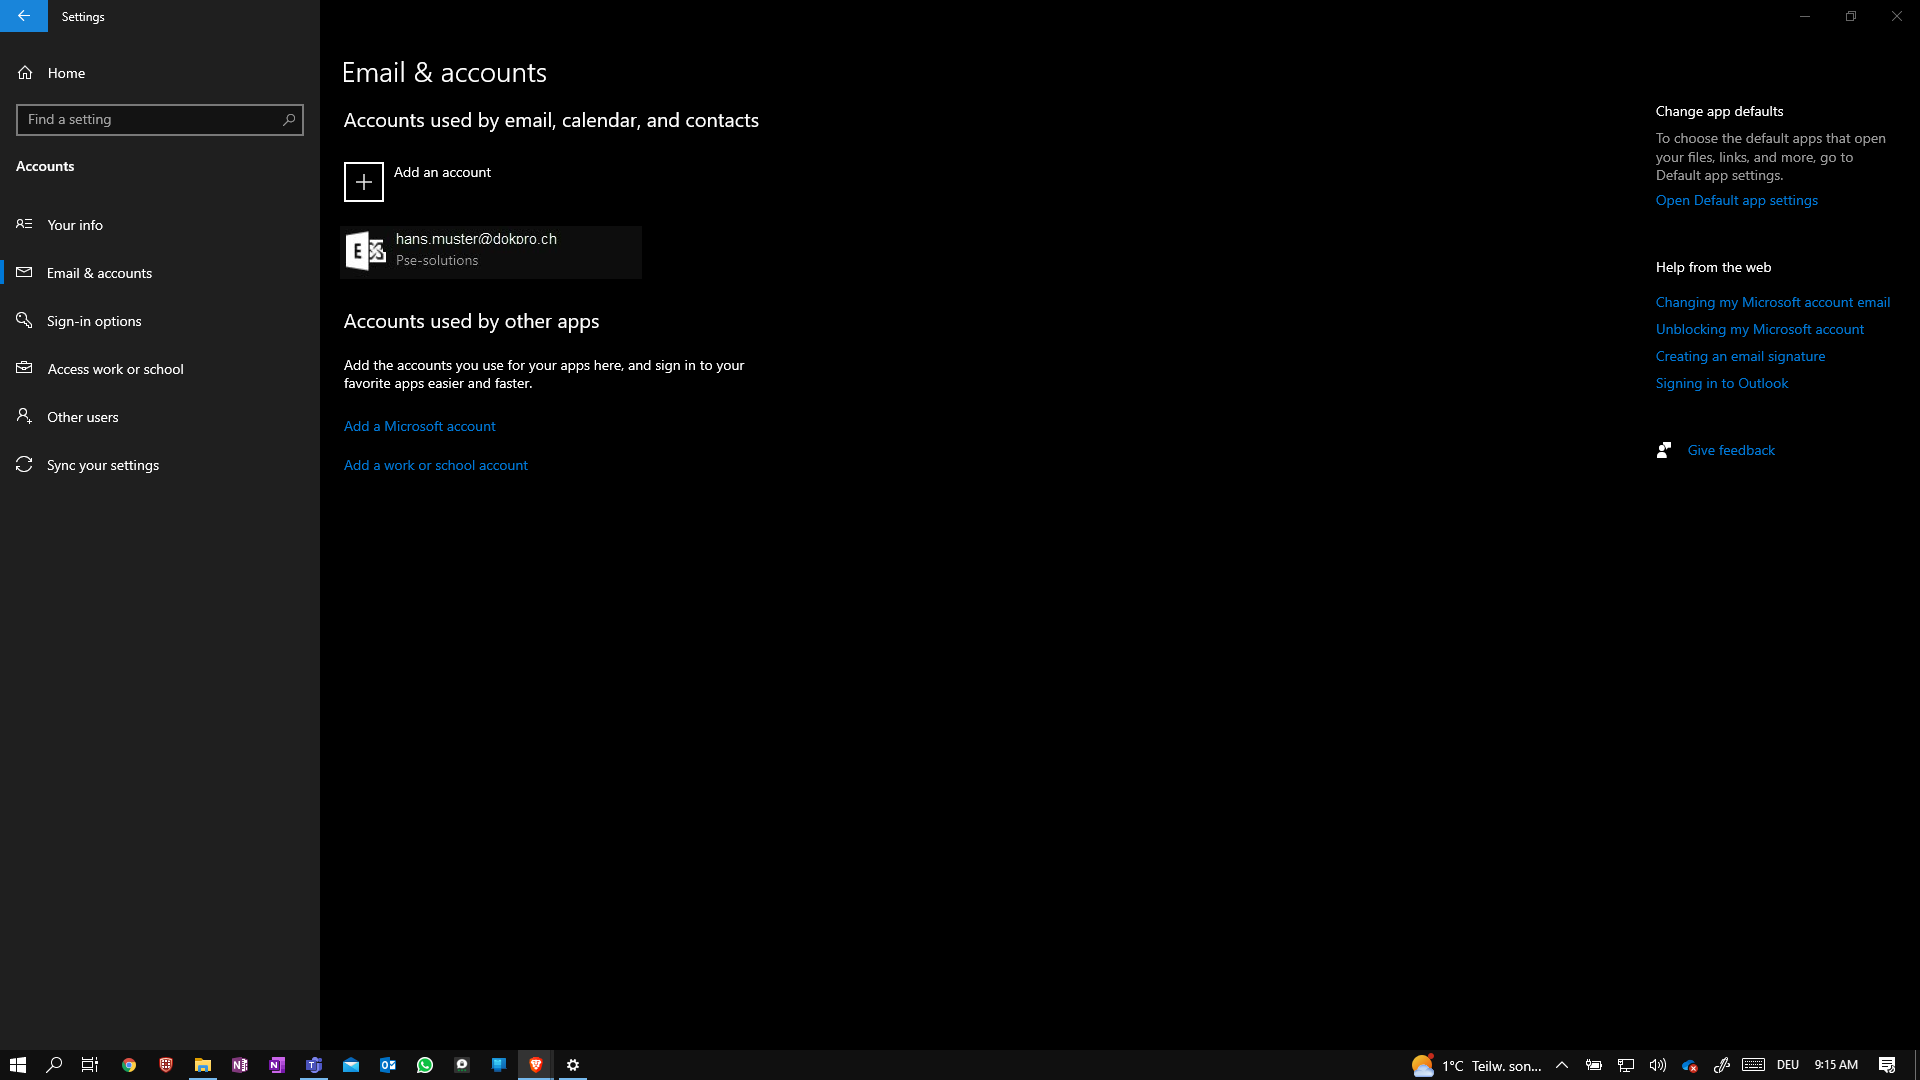
After further confirmation of the entries, the Exchange account will be added. This may take a moment. If you get a Windows request to make adjustments, confirm it. After that you should get the following screen.
Now select the Exchange connection and go to the Manage field.

Now select the field "Change Mailbox sync setting" (ATTENTION: If Windows is still synchronizing the Exchange, the field is grayed out and cannot be edited yet. Wait until the Exchange has finished synchronizing).

In this setting you can now choose what you want to synchronize. Switch off e-mails and calendars, so that only the contacts are synchronized.


Confirm the deactivation with the button "Done". Confirm further with "Save".
Now Windows will execute the selected adjustments in the background. Depending on the settings, this may take a moment.
Import contacts into DokPro
If you completed the before mentioned steps and Windows has synchronized the contacs, then your contacts are connected to your DokPro contacts. (DokPro accesses the Windows contacts).

ATTENTION: Only your own contacts will be synchronized. If you have a general address bank stored in Outlook, these contacts will not be synchronized. This is a security setting of Outlook, which does not allow this. Make sure that you have saved the desired contacts under My Contacts.
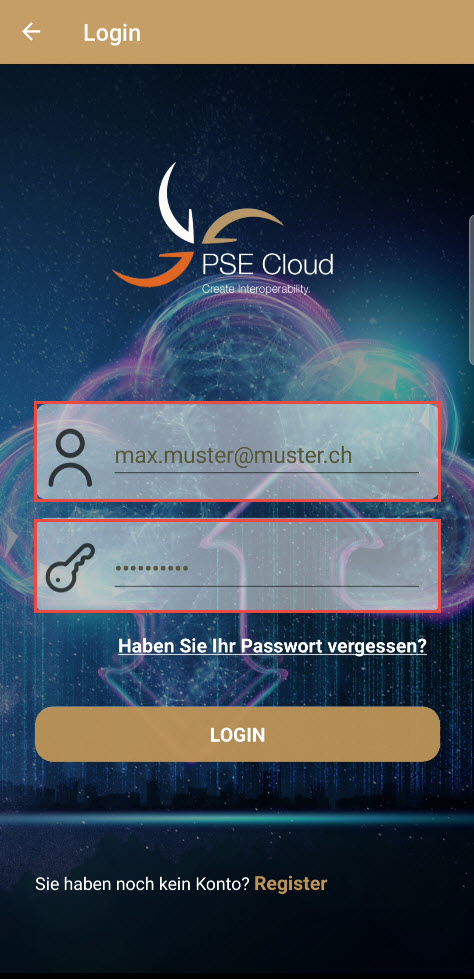
The first step is to log in to the PSE Cloud.
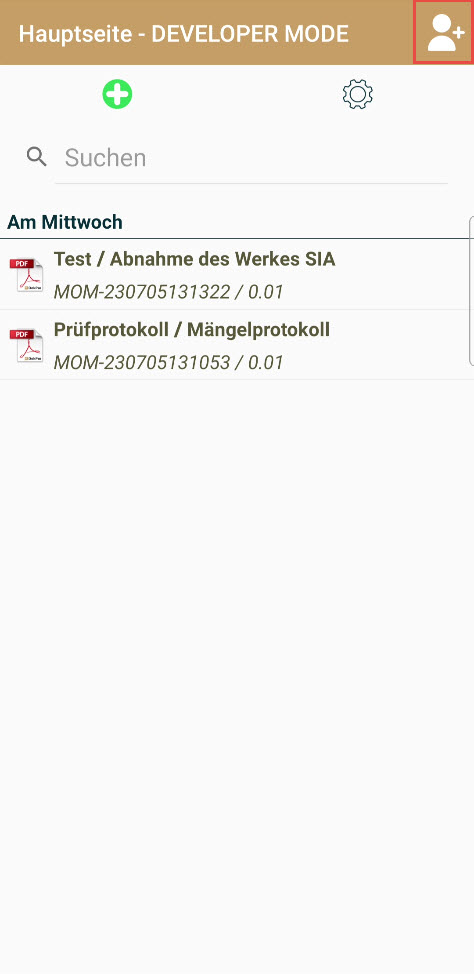
To do this, select the profile icon at the top right:
Then enter your login data of the PSE Cloud:
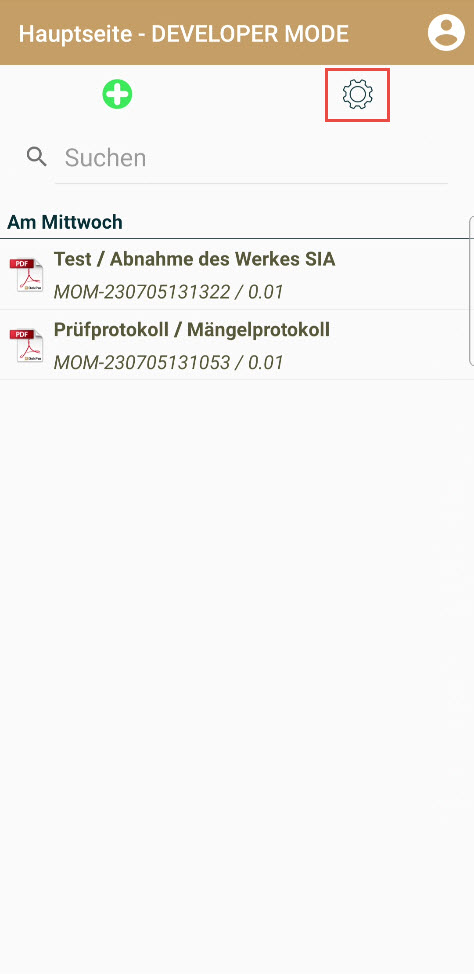
After that you will be redirected back to the main page.
There you select the gear icon to enter the settings:
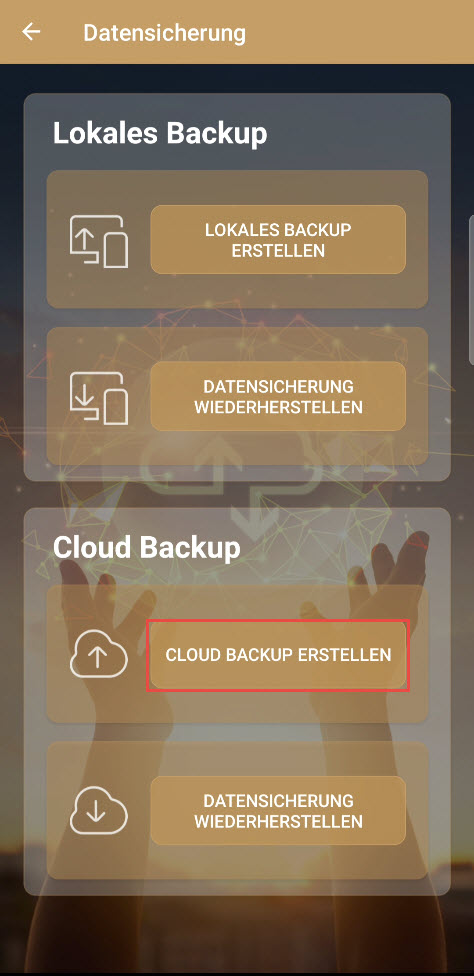
In the settings, select the "Backup" tab:
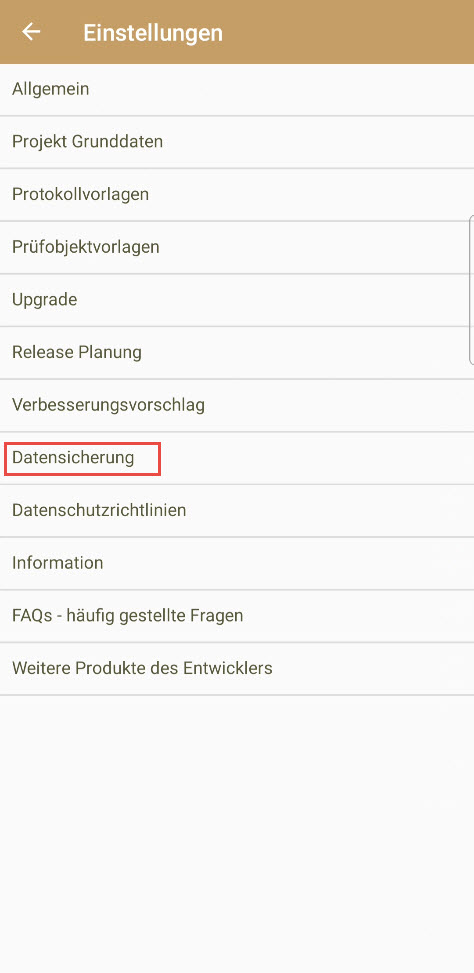
In this tab, you will see your backup options.
There you select the "Create Cloud Backup" button: